MS Teams for Remote Communication
Microsoft Teams is a tool for group chat that is included with our Office 365 environment. Teams works as a channel of communication that fits between email and Zoom. It is less formal and more real-time than email and it is quicker for short chats than organizing a Zoom meeting. Each mode has benefits and adding Teams is not a replacement for email or Zoom
As a rapid response to COVID-19, we have set up Teams for each Area. Extension staff will be added to the appropriate Areas.
Known Issue: The county support staff wisc.edu email accounts are not licensed for Teams. We can add county staff as guests using their county email addresses. See below for access steps for county support staff.
Once added, you will receive an automated email notifying you of access to the Team and associated Group site. These emails will come from Kevin Graeme and are not spam.
How To Access Your Team
Extension Staff Quick Steps
- Log into your UW-Madison Office 365 email online.In the top left, click the grid of squares (the “waffle”).
- Click Teams.
- Open using the online web version.
Steps with pictures
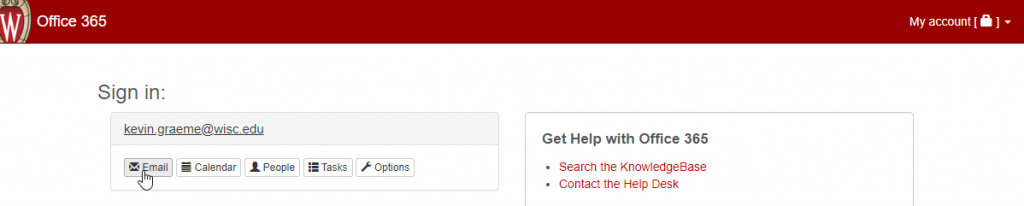
1. Log into your UW-Madison Office 365 email online.
Starting from wisc.edu, click “MyUW” and select “EMAIL/CALENDAR”.

If needed, pick your account.
2. From Outlook Online, in the top left, click the grid of squares (the “waffle).
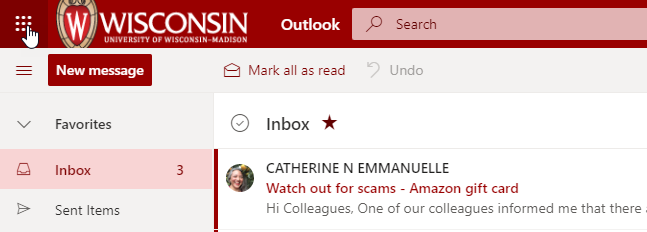
3. Click Teams

4. Open using the online web version
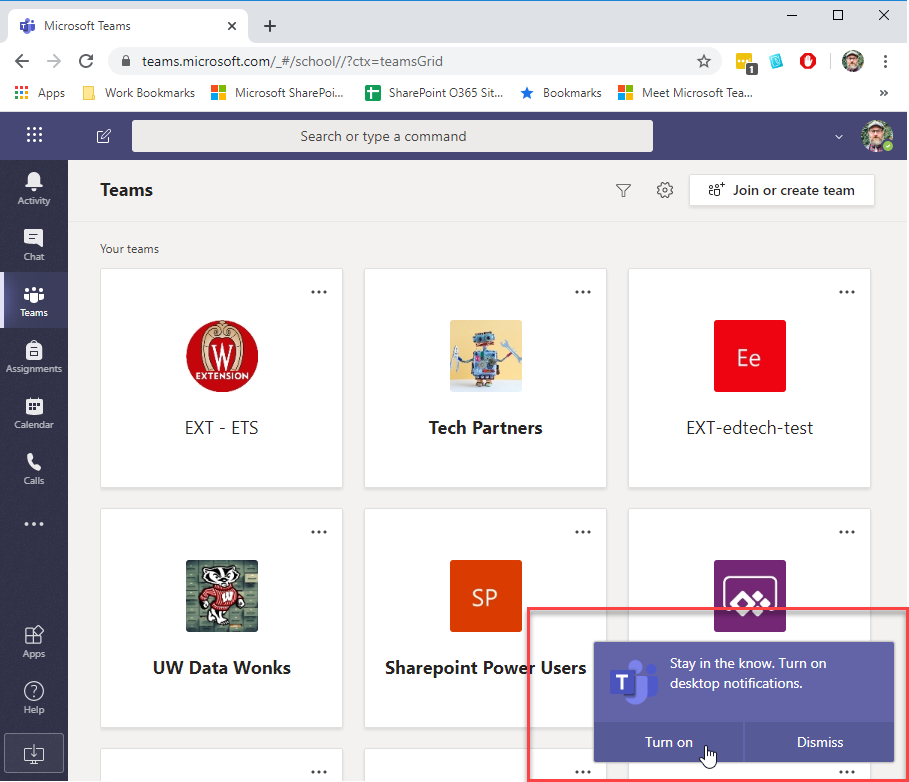
Be sure to allow desktop notifications to not miss messages.
Or open it directly at teams.microsoft.com
County Staff Quick Steps
Important! We recommend you do the following in an incognito browser.
Click the link in the invitation email or go to https://teams.microsoft.com.
If you already have a Microsoft account associated with your guest email, log in to that account. If you don’t, you can create one using the link on the login screen.

Once logged in, you’ll get a screen that says, “You’ve been invited to UW-Madison.” Click the “Continue” button.

Using Teams Once You Are In…
Teams includes several tools: group chat, person-to-person chat, a group email address, and group file storage.
Team Group Chat
Group chat happens in channels. Every Area Team will start with a General channel and a channel for each county.
Subscribing to a Chat Channel
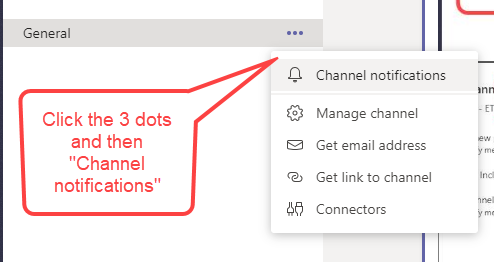
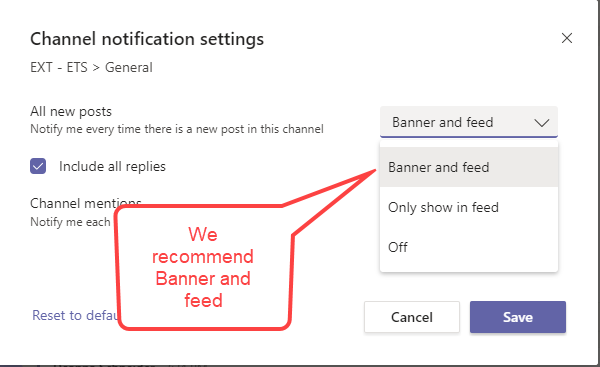
If you want to get notifications when there’s a new message in a chat channel, you’ll need to update the Channel notifications. To do that, click the 3 dots next to the channel name and then click on “Channel notifications.”
For each channel you can choose off, only show in feed, or banner and feed. We recommend choosing “banner and feed” for your important channels.
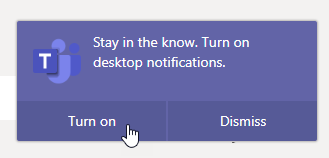
If you’re using the browser version of Teams, be sure to allow desktop notifications by clicking “Turn on” in the popup window in the bottom left.
Files and Chat
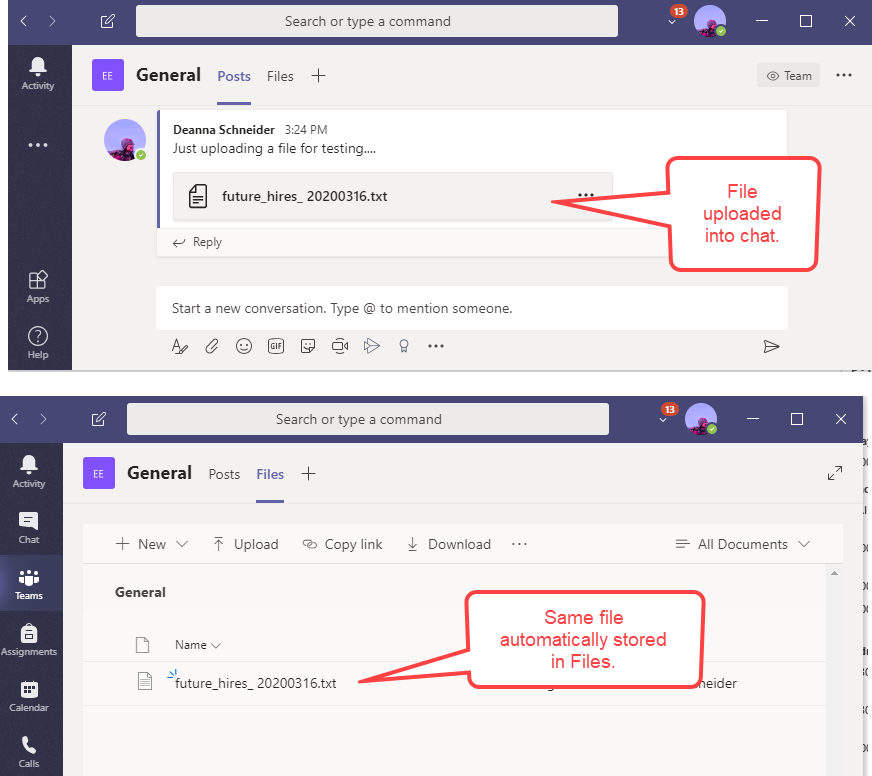
Files uploaded into a chat channel are automatically stored in the Files tab for you. This is a SharePoint document library.
While the files are accessible directly in Teams, you can also quickly navigate to the accompanying SharePoint site by clicking “Open in SharePoint” at the top of the files tab:

Once you’re in SharePoint, you can choose to sync the files to your local computer:

Adding New Channels
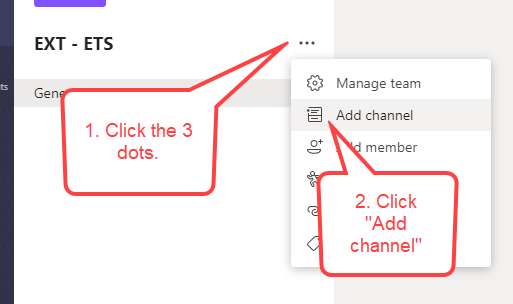
If you are the site owner and wish to add more channels, you may do so by clicking the 3 dots next to the team name and choosing “Add channel.”
You’ll need to enter a channel name and description, and choose if the channel is accessible to everyone in the group or just a subset of people in the group.
Person-to-person chat
In addition to the Team Group Chat, you can also use Teams to chat directly with a single individual. This could be useful if you need to have a conversation with an AED or a colleague and you don’t want to broadcast it to the whole Area.
Switch to “Chat” by selecting it in the left sidebar above “Teams”
Find a contact by selecting “Contacts” and searching for them in the search bar above the main chat panel.
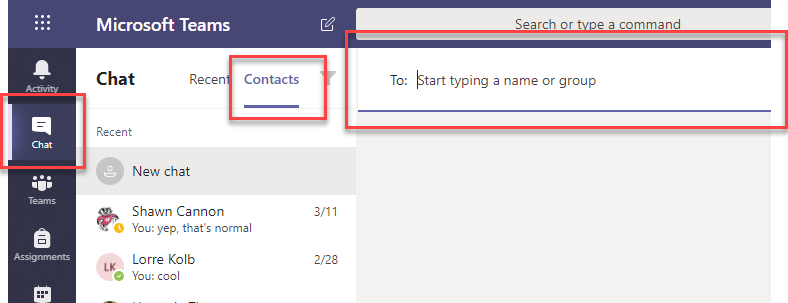
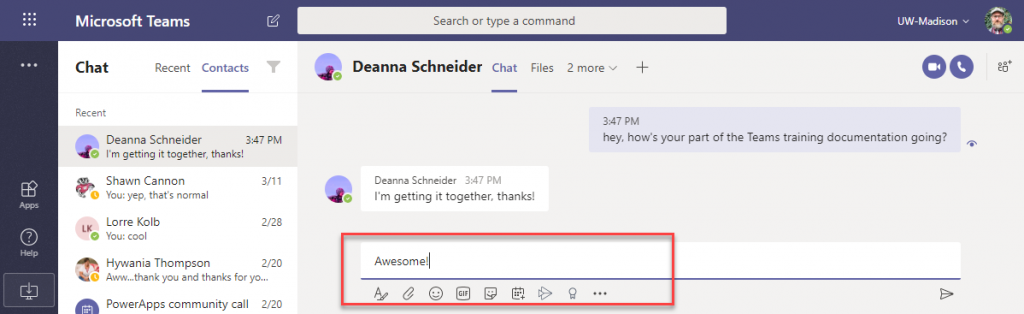
Then start chatting by entering your messages at the bottom, just like other chat and texting tools
Group Email
Each Team comes with its own O365 Group email. You can email your entire team a couple of different ways.
NOTE: This should not be used to replace your area WiscList at this time. We’re explaining the functionality because otherwise people may be confused if they send an email and don’t know where it went.
From the Outlook Client or Outlook Online
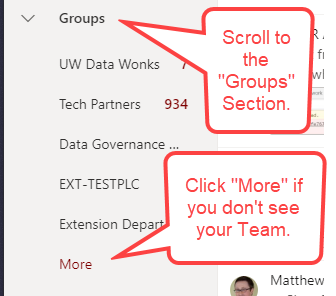
In either the Desktop Outlook client or in Outlook Online, your groups appear in the left column below your inbox. If you have a lot of folders in your inbox, you may need to scroll down a ways.
When you find the “Groups” section, look for your Team name. It should start with EXT-. You may need to click “more” at the bottom of the groups section to find it. Once you’ve found it, click on it.
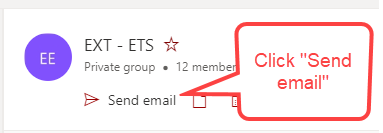
If you’re using Outlook Online, you can send an email by clicking the “Send Email” link at the top of your group inbox.
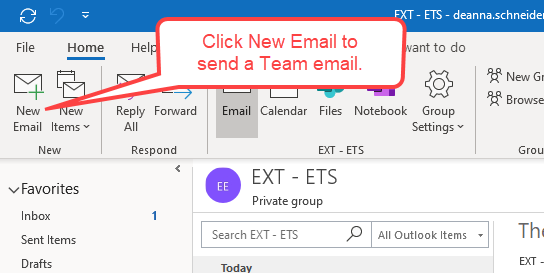
If you’re using Outlook Desktop Client, once you click into your group you can use the “New Email” button in the ribbon to send a new email:
You can also send directly to an email address for the group. To find your group’s email address, use the Outlook Web client and start a new email, then right click the pill-shaped icon for the email address and click “Copy email address.” In general, your group email address will follow the format of team-name@office365.wisc.edu. For instance, Ext-Area10 would be ext-area10@office365.wisc.edu.
Emailing a Team Channel
In Teams you can also send an email directly to a Team Channel. This will automatically store the email and any attachments to it in the channel that you email. It will not show up in people’s inboxes, though.
To send an email to a channel, first click the 3 dots next to the channel name and click “Get email address.”
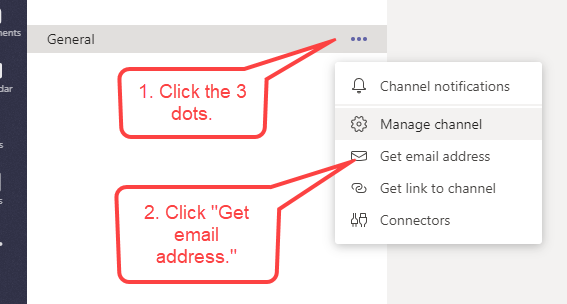
Next, click “copy” on the window that pops up. Then paste that email address in your regular email tool. Once you’ve sent one email, you can start typing the channel name in Outlook and it will suggest the channel to you: